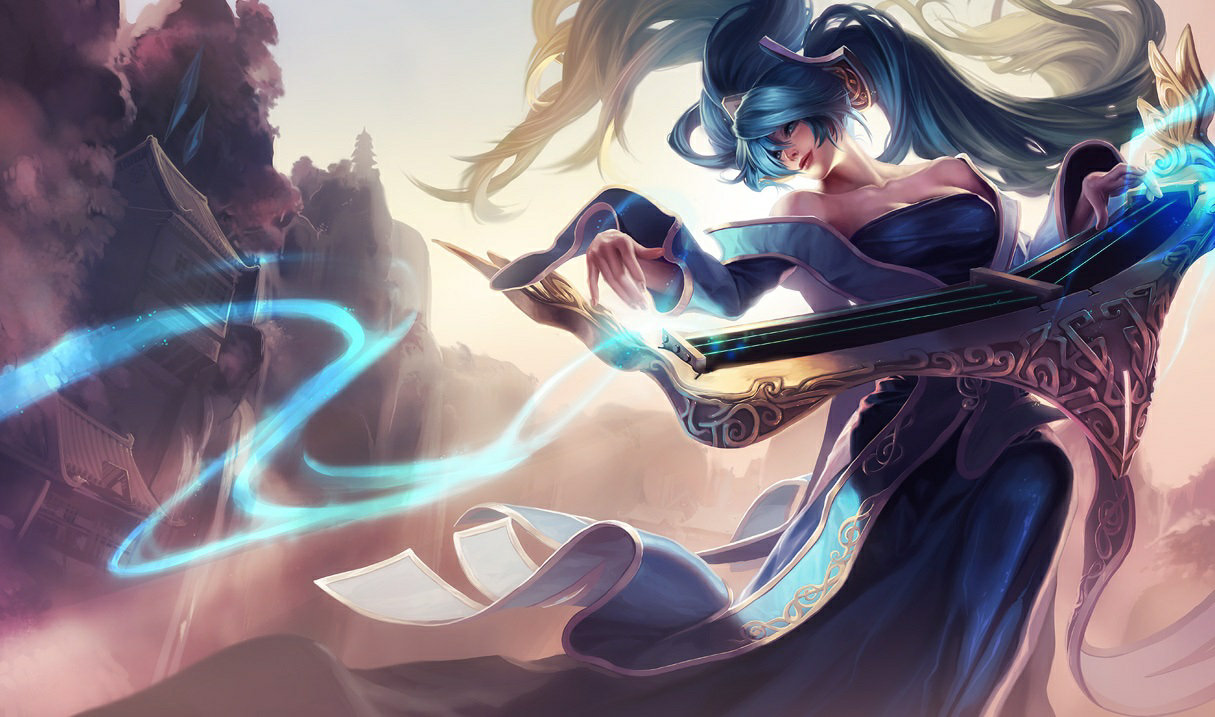
How to Play Sona: 5 Pro Tips to Master This Support Champion
Find Your Counter Pick & Track Your Champion Pool
Use our free tools to counter any champion, take a quiz to find your perfect main, and track your practice sessions.
Overview
How to play Sona effectively involves mastering her Power Chord mechanics, perfecting positioning, and understanding her scaling nature as a support champion who transforms from vulnerable early game to teamfight powerhouse. Her unique blend of sustained healing, damage, and utility makes her one of the highest win-rate supports in the late game, rewarding players who can maintain proper spacing while continuously cycling through her low-cooldown abilities to provide team-wide buffs.
Table of Contents
Mastering the melodic maven of Runeterra doesn’t have to be a complex symphony. Learning how to play Sona effectively can transform your support game and elevate your team’s performance in League of Legends. As one of the most accessible yet impactful enchanters in the game, Sona offers a unique blend of sustained healing, damage, and utility that scales impressively into the late game.
This comprehensive guide will walk you through everything you need to know about playing Sona – from her basic mechanics to advanced positioning techniques. Whether you’re just picking her up or looking to refine your skills, these five essential tips will help you orchestrate victories from the support role.
Understanding Sona’s Unique Playstyle
Before diving into specific tips on how to play Sona, it’s essential to understand what makes her unique. Sona is a scaling enchanter support who transforms from a somewhat vulnerable early-game champion into a teamfight powerhouse as the match progresses.
Unlike champions like Leona who excels at engage tactics, Sona’s strength lies in her persistent auras and consistent output of healing, shielding, and damage. Her passive, Power Chord, adds an extra layer of utility to her abilities and rewards players who can count their spell casts and manage their positioning carefully.
Sona thrives in extended fights where she can continuously cycle through her abilities. The longer a teamfight lasts, the more value Sona provides through her low-cooldown heals, shields, and movement speed buffs. This scaling nature makes her one of the highest win-rate supports in the late game according to League of Graphs statistics.
Now that we understand Sona’s core identity, let’s explore the five essential tips that will help you master this melodious support.

Tip 1: Master Your Power Chord Mechanics
Sona’s passive, Power Chord, is the heart of her kit and understanding how to use it effectively is crucial to learning how to play Sona well. After casting three basic abilities, your next basic attack is empowered and applies an additional effect based on the last ability you used.
Here’s a breakdown of each Power Chord variant:
Q Power Chord (Staccato): Deals additional damage. This is your offensive option and should be used when trading or helping to secure kills.
W Power Chord (Diminuendo): Reduces the target’s damage output by 25% for 3 seconds. This is incredibly powerful against assassins or during teamfights to neuter the enemy carry.
E Power Chord (Tempo): Slows the target by 40% for 2 seconds. Use this for catching enemies or peeling for your teammates.
The key to mastering Sona lies in preparing the right Power Chord for the right situation. For instance, if you see the enemy jungler approaching for a gank, having your E Power Chord ready can help your ADC escape. During an all-in trade, preparing your W Power Chord can significantly reduce incoming damage.
To optimize your Power Chord usage:
- Track your spell count constantly (a faint visual indicator appears around Sona)
- Plan ahead which Power Chord effect you’ll need next
- Use your auras on cooldown during fights to cycle through Power Chords faster
- Remember that Power Chord auto-attacks reset your basic attack timer
A common mistake new Sona players make is failing to weave auto-attacks between abilities. Since your passive transforms your auto-attack, you should be actively looking for opportunities to proc Power Chord rather than just casting abilities from a distance.
Tip 2: Perfect Your Positioning and Spacing
Sona is one of the squishiest champions in League of Legends, making proper positioning absolutely critical to your success. Unlike tankier supports like Morgana with her Black Shield, Sona lacks defensive tools outside of her E movement speed boost and Ultimate.
The art of playing Sona well comes down to maintaining the perfect distance – close enough to tag enemies with your Q and Power Chords, but far enough to avoid being caught and instantly deleted.
Here are positioning tips for different phases of the game:
Laning Phase:
- Position diagonally from your ADC to avoid both of you getting hit by the same skillshot
- Use bushes to launch unexpected Q pokes and Power Chord attacks
- Stand behind minions against hook champions like Blitzcrank or Thresh
- Retreat behind your ADC when your abilities are on cooldown
Mid-Game Rotations:
- Never face-check bushes – use your Q’s auto-targeting to check safely
- Stay within aura range of allies when moving through the jungle
- Position near walls that can be flashed over if you get caught
Teamfights:
- Position at the edge of your aura radius to maximize safety while still buffing allies
- Stay behind your frontline but within range to tag priority targets with Power Chords
- Look for multi-man ultimate opportunities without putting yourself at risk
One advanced positioning technique when learning how to play Sona is to use her E ability not just for the movement speed, but to adjust your position slightly before teamfights. This ensures you’re in the optimal spot to hit multiple allies with your auras while remaining safe from enemy threats.
Tip 3: Optimize Your Build Path and Runes
Building Sona correctly is essential to maximizing her potential as a scaling support. Her item choices have evolved over the seasons, but a few core principles remain consistent.
Core Items:
- Spellthief’s Edge → Shard of True Ice: Always start with this support item for the income and stats
- Moonstone Renewer: Your primary mythic that amplifies healing and shielding
- Staff of Flowing Water/Ardent Censer: Choose based on your team composition
- Chemtech Putrifier: Essential against healing-heavy teams
Situational Items:
- Shurelya’s Battlesong: Alternative mythic when your team needs engage help
- Mikael’s Blessing: Against heavy CC compositions
- Redemption: For additional teamfight presence
- Mejai’s Soulstealer: If you’re confident in your positioning and survival
For boots, Ionian Boots of Lucidity are generally the best choice for the ability haste, though Mobility Boots can work for better map presence if your team needs more vision control.
When it comes to runes, Sona has several viable options:
Primary Tree (Sorcery):
- Summon Aery: The standard keystone that enhances both poke and shields
- Manaflow Band: Essential for mana management
- Transcendence: Provides valuable ability haste
- Gathering Storm: Enhances your scaling power
Secondary Tree Options:
- Resolve: Bone Plating + Revitalize for survivability
- Inspiration: Biscuit Delivery + Cosmic Insight for lane sustain and utility
Your rune choices should complement your playstyle and the specific match you’re in. Against heavy poke lanes, Resolve secondary can help you survive, while Inspiration helps with early mana issues in lanes where you need to be more active.
As noted by LoLalytics data, Sona’s win rate increases significantly with items that enhance her scaling nature, particularly when paired with champions who benefit from her auras.
Tip 4: Understand Lane Matchups and Synergies
Knowledge of matchups is crucial when learning how to play Sona effectively. As a scaling enchanter, you need to identify which lane opponents you can safely poke and which ones require a more cautious approach.
Favorable Matchups:
- Enchanter supports like Nami or Lulu (relatively even scaling)
- Low-threat tanks like Taric or Braum (can’t easily punish your poke)
- Supports with dodgeable skillshots like Lux (your mobility can help avoid their key abilities)
Challenging Matchups:
- All-in supports like Leona or Nautilus (they can lock you down easily)
- Hook champions like Blitzcrank or Pyke (one hook can mean death)
- Poke mages like Xerath or Vel’Koz (they outrange you significantly)
Against difficult matchups, focus on sustaining your ADC and scaling rather than trying to win lane. Playing safely and reaching your power spikes is more important than risking deaths for minor advantages.
Equally important are ADC synergies. Sona works exceptionally well with:
- Ezreal: His self-sufficient playstyle allows Sona to scale safely
- Jinx/Kog’Maw: Hypercarries who benefit greatly from your movement speed and shields
- Miss Fortune: Your ultimate sets up her ultimate perfectly
When playing with aggressive early-game ADCs like Draven or Lucian, communicate that you need to play for scaling rather than early dominance. Similar to Seraphine’s supportive style, your value increases dramatically as teamfights become more frequent.
A key aspect of learning how to play Sona is adapting your playstyle based on these matchups. Against heavy engage supports, save your E for escape and focus on defensive Power Chords. Against enchanters, be more aggressive with Q poke and Power Chord damage.

Tip 5: Maximize Your Late-Game Impact
Sona’s true power emerges in the late game, where her low cooldowns and impactful auras can turn the tide of teamfights. Understanding how to leverage this scaling advantage is key to mastering how to play Sona.
By the late game, your ability haste should be high enough that you can cycle through abilities constantly, providing near-permanent buffs to your entire team. Here’s how to maximize your impact:
- Aura Management: Position to hit as many allies as possible with each ability
- Ultimate Usage: Save Crescendo for key moments rather than initiation
- Power Chord Targeting: Use W chord on enemy carries and E chord to peel
- Vision Control: Establish vision around objectives safely using your mobility
Your ultimate, Crescendo, is one of the most game-changing abilities in teamfights. While it can be used offensively to engage, it’s often more valuable as a counter-engage tool or to peel for your carries. The stun duration is long enough to turn around a diving assassin or to disrupt an enemy team’s coordination.
In late-game scenarios, prioritize staying alive over everything else. Your consistent output of heals, shields, and buffs is worth more than landing a single aggressive Power Chord that might put you in danger. Similar to playing Karma in teamfights, your presence alone creates a significant advantage for your team.
Another key aspect of late-game Sona is objective control. Your E provides a team-wide movement speed boost that can help secure Baron or Elder Dragon, or facilitate quick rotations between lanes. Use this mobility advantage to help your team maintain map control even when numbers appear even.
Common Mistakes to Avoid When Playing Sona
Even experienced players can fall into some common traps when learning how to play Sona. Avoiding these mistakes will dramatically improve your performance:
- Overaggressive Early Positioning: Remember that you’re extremely vulnerable before getting your core items
- Mana Mismanagement: Spamming abilities in lane will leave you OOM when you need them most
- Inefficient Power Chord Usage: Using Q Power Chord when W would save a teammate
- Poor Vision Control: Facecheck deaths are particularly common with Sona
- Mistimed Ultimates: Wasting Crescendo on tanks or when no follow-up is available
Unlike Janna who excels at disengage, Sona has fewer defensive options if caught out of position. This makes positional errors particularly punishing, especially against assassination or dive compositions.
Remember that while Sona is simple mechanically, her skill ceiling comes from decision-making and positioning. Constantly ask yourself if you’re in the optimal position to provide value while minimizing risk.
Gear That Helps You Climb
The right mouse, keyboard, and monitor won’t win you games — but they remove excuses. See what the pros actually use.
View Recommended Gear Mice, keyboards, monitors, headsets & more — researched from pro setupsConclusion
Mastering how to play Sona is about understanding her unique rhythm – knowing when to poke, when to sustain, and how to position to maximize her auras while staying safe. Her seemingly simple kit hides incredible depth and potential that rewards patient, thoughtful play.
By focusing on these five essential tips – mastering Power Chord mechanics, perfecting positioning, optimizing builds, understanding matchups, and maximizing late-game impact – you’ll be well on your way to orchestrating victories from the support role.
Remember that Sona’s strength lies in her scaling. Don’t be discouraged by a quiet early game – your goal is to reach those team-defining late-game moments where your consistent output of healing, shielding, and utility turns the tide in your favor.
Now that you know how to play Sona effectively, take these melodies to the Rift and conduct your team to victory!
Frequently Asked Questions
Is Sona good for beginners in League of Legends?
Yes, Sona is excellent for beginners due to her straightforward abilities and forgiving playstyle that focuses on positioning rather than complex mechanics. Her scaling nature also teaches new players the importance of farming and avoiding unnecessary deaths.
How do I deal with Sona’s mana problems early game?
Manage Sona’s early mana by taking Manaflow Band, building Tear of the Goddess if necessary, and being selective with ability usage. Focus on using abilities only when your Power Chord is ready or when the situation truly demands it.
When should I pick Sona over other enchanter supports?
Pick Sona when your team composition includes multiple auto-attackers who benefit from her auras and when you expect games to go long. She’s particularly strong with hypercarry ADCs and against teams without strong dive or assassination threats.
What’s the best way to use Sona’s ultimate?
Sona’s ultimate is best used reactively to counter enemy engages, protect your carries from divers, or to follow up on your team’s initiation. While it can be used offensively, its value as a defensive tool is often higher, especially against assassination compositions.
How do I survive lane phase as Sona against aggressive supports?
Against aggressive supports, focus on staying healthy with W, maintain proper spacing, and avoid pushing the wave to prevent being exposed to all-ins. Consider defensive


