How to Play Gnar: 5 Essential Tips for Top Domination
Find Your Counter Pick & Track Your Champion Pool
Use our free tools to counter any champion, take a quiz to find your perfect main, and track your practice sessions.
Overview
How to play Gnar effectively requires mastering his unique rage mechanic and dual forms – Mini-Gnar for ranged poke and mobility, and Mega-Gnar for crowd control and team fighting. Success with this versatile top laner depends on proper transformation timing, lane dominance through positioning, optimal build paths, coordinated team fighting, and advanced techniques like wall awareness for ultimate placement.
Table of Contents
Introduction to Gnar: The Missing Link
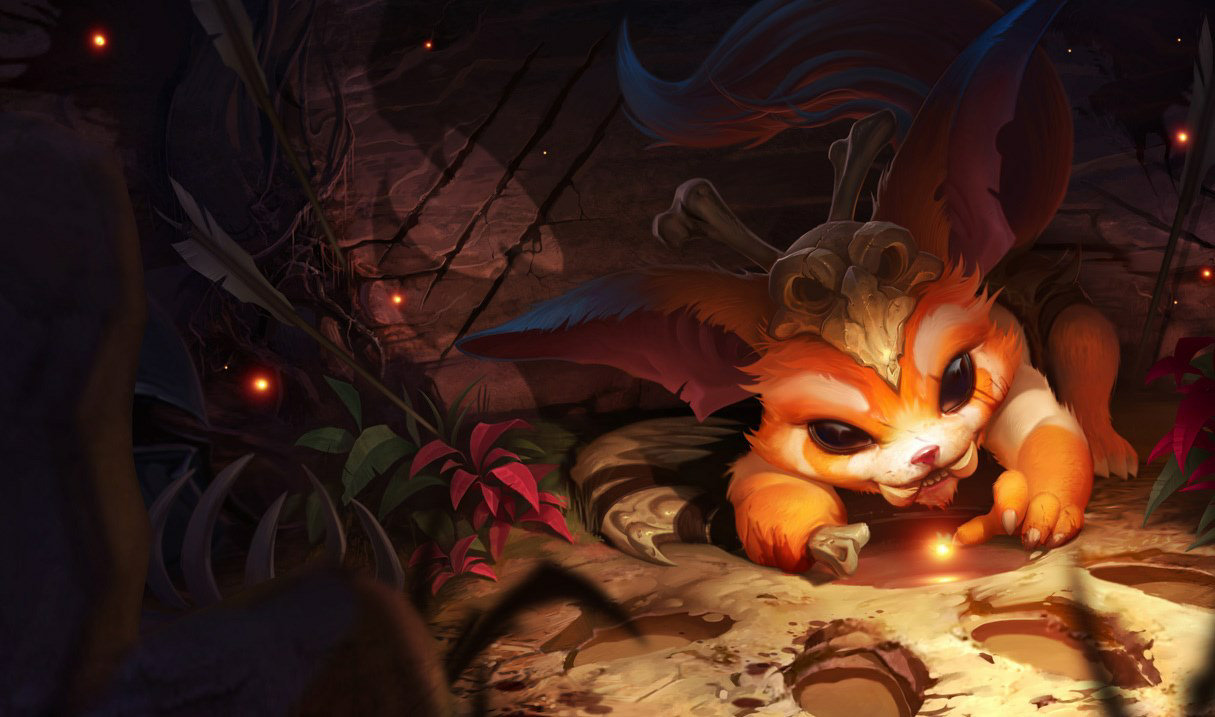
Learning how to play Gnar effectively can be the difference between climbing ranks and staying stuck in your League of Legends journey. As one of League of Legends’ most versatile top laners, Gnar offers a unique playstyle that rewards strategic thinking and proper timing. This prehistoric yordle transforms between two distinct forms—Mini-Gnar and Mega-Gnar—each with its own strengths and abilities.
Mastering how to play Gnar requires understanding both forms and knowing when to utilize each one’s unique advantages. In this comprehensive guide, we’ll explore five essential tips that will help you dominate the top lane and carry your team to victory. Whether you’re a beginner looking to add Gnar to your champion pool or an experienced player wanting to refine your skills, these strategies will elevate your gameplay.
Unlike champions such as Darius with his straightforward approach, Gnar demands a higher level of awareness and timing. However, this complexity is precisely what makes him so rewarding to master. Let’s jump into what makes Gnar special and how you can harness his full potential on the Rift.
Understanding Gnar’s Unique Rage Mechanic
Before diving into specific strategies, it’s crucial to understand how to play Gnar’s distinctive rage mechanic. Unlike mana or energy, Gnar builds rage through basic attacks and using abilities. Once his rage bar fills completely, he transforms into Mega-Gnar for 15 seconds, gaining new abilities and stat bonuses.
In Mini-Gnar form, you’re a nimble, ranged attacker with excellent kiting potential. Your attacks are quick, and you have high mobility thanks to your Hop ability. This form excels at poking enemies, farming safely, and maintaining distance from threats.
Conversely, Mega-Gnar transforms you into a hulking beast with melee attacks and powerful crowd control abilities. Your health and resistances increase significantly, but you lose movement speed and attack speed. Mega-Gnar shines in team fights with area-of-effect stuns and displacement effects.
The key to mastering how to play Gnar lies in managing this transformation effectively. You’ll want to coordinate your rage bar to transform at opportune moments, particularly before important objectives or team fights. Additionally, understanding that Mini-Gnar excels at sustained damage while Mega-Gnar provides burst damage and disruption will help you maximize your impact throughout the game.

Essential Tip #1: Master the Mini-Gnar to Mega-Gnar Transformation
The first essential tip for how to play Gnar effectively is mastering the transformation timing between his two forms. This is perhaps the most critical aspect of Gnar’s gameplay that separates good players from great ones.
When your rage bar reaches about 80%, start positioning for a potential engagement. Remember that your rage builds faster when you’re attacking enemies, so you can accelerate or delay your transformation by adjusting your aggression level. Use this to your advantage by:
- Building rage quickly when a jungler is approaching for a gank
- Holding rage at around 70-80% when preparing for an objective
- Avoiding unnecessary auto-attacks if you need to stay in Mini-Gnar form longer
- Using your passive cooldown indicator to track when you can transform again
A common mistake many players make when learning how to play Gnar is transforming at inopportune times. If you transform into Mega-Gnar without enemies nearby, you waste valuable crowd control potential. Conversely, transforming into Mega-Gnar with low health during a 1v1 might save your life due to the health bonus you receive.
Practice using Mini-Gnar’s mobility to position yourself for optimal Mega-Gnar engages. For instance, you might hop near a wall so that when you transform, you can use Mega-Gnar’s GNAR! ultimate to slam enemies into it. This kind of foresight comes with experience but dramatically increases your effectiveness on the champion.
Similar to how Fiora players must master vital positioning, Gnar players must become experts at rage management and transformation timing. Both champions reward positional awareness and strategic thinking.
Essential Tip #2: Dominate Lane Phase with Proper Poke and Positioning
The second crucial aspect of how to play Gnar is dominating your lane through effective poke and positioning. Mini-Gnar’s ranged attacks and Boomerang Throw (Q) make him an exceptional lane bully against most top lane matchups.
Start by establishing control over the minion wave. Use your auto-attacks to harass the enemy champion whenever they approach to last hit. Your Hyper (W) passive applies a three-hit effect that deals percent health damage and grants you movement speed, making you excellent at trading and escaping retaliation.
Position yourself to maximize your Boomerang Throw efficiency. When thrown, the boomerang returns to you, potentially hitting enemies twice. Clever positioning allows you to:
- Hit the enemy with both the outgoing and returning boomerang
- Last hit minions while simultaneously poking the enemy
- Catch the boomerang to reduce the cooldown
- Use the boomerang to check bushes safely
Wave management is particularly important when learning how to play Gnar. Against strong all-in champions like Aatrox, you’ll want to freeze the wave near your tower while in Mini-Gnar form. This gives you the safety to farm and poke without extending too far.
Conversely, when facing more passive opponents or when your jungler is nearby, you can push the wave and harass under tower. The recent changes to Gnar’s kit have made him particularly effective at this strategy, as noted by official League patch notes.
Remember that your Hop (E) is your primary escape tool. Be judicious with its use, especially against champions with gap closers. Using it offensively should only be done when you have vision of the enemy jungler or when you’re confident you can secure a kill without being punished.
Essential Tip #3: Optimize Your Build Path for Maximum Impact
The third tip for how to play Gnar effectively involves optimizing your build path to complement his dual nature. Gnar’s unique transformation mechanic means he benefits from a wide range of stats, but certain items synergize particularly well with his kit.
For starting items, Doran’s Blade provides good sustain and trading potential in the early game. Against poke-heavy matchups, Doran’s Shield might be preferable. Your first major item should typically be Black Cleaver or Divine Sunderer, both offering a strong mix of damage, health, and ability haste.
Core items that work exceptionally well with Gnar include:
- Black Cleaver – Provides health, damage, and armor shred that synergizes with your attack speed as Mini-Gnar
- Divine Sunderer – Offers great dueling potential with Spellblade procs and percent health damage
- Dead Man’s Plate – Enhances your mobility as Mega-Gnar while providing tankiness
- Force of Nature – Crucial against AP-heavy teams
- Sterak’s Gage – Grants a shield that can save you during transformations
Your boots choice should depend on the enemy team composition. Mercury Treads help against heavy crowd control, while Plated Steelcaps counter auto-attack reliant opponents. In some situations, Ionian Boots of Lucidity can provide valuable ability haste for more frequent ability usage.
For runes, Fleet Footwork, Conqueror, or Grasp of the Undying all work well depending on your playstyle and matchup. Secondary runes from the Inspiration or Resolve tree provide additional sustain and utility. According to professional player builds, the flexibility in Gnar’s rune choices allows you to adapt to various situations.
Similar to how Dr. Mundo builds differently based on matchups, your Gnar build should be flexible. Against heavy burst, prioritize health and resistances. When ahead, consider more damage-oriented items like Death’s Dance or Guardian Angel.

Essential Tip #4: Team Fighting as Gnar – Timing is Everything
The fourth essential tip for how to play Gnar focuses on team fighting, where his impact can be game-changing with proper execution. Unlike champions such as Ashe who provides consistent utility, Gnar’s contribution to team fights varies dramatically based on his form.
When approaching a potential team fight, your first consideration should be your rage bar. Ideally, you want to enter the fight with around 80-90% rage so you can transform at the optimal moment. Communicate with your team about your transformation status to coordinate engages effectively.
In Mini-Gnar form during the early stages of a team fight:
- Stay at the backline with your ADC and poke with Boomerang Throw
- Use Hyper procs to kite approaching enemies
- Build rage by auto-attacking frontline targets safely
- Save your Hop for either escaping or positioning for your transformation
As you approach transformation, move toward a position where you can impact multiple enemies with Mega-Gnar’s abilities. The perfect Mega-Gnar engage often involves:
- Landing a multi-target Boulder Toss (Q) to slow enemies
- Using Crunch (E) to position yourself behind priority targets
- Following up with Wallop (W) for an area stun
- Finishing with GNAR! (R) to push enemies into a wall or your team
One of the most devastating combos in the game is properly executing Mega-Gnar’s E-Flash-R combination. This involves using Crunch, then immediately Flashing to reposition, followed by your ultimate to slam enemies into a wall. According to win rate statistics, mastering this combo can significantly increase your effectiveness in team fights.
Remember that your role changes based on your team composition. In teams with multiple engage options like Alistar, you might focus more on follow-up CC rather than primary engagement. Conversely, in poke compositions, you might prioritize staying in Mini-Gnar form longer for sustained damage.
Essential Tip #5: Advanced Gnar Techniques for Climbing Ranks
The final tip for how to play Gnar covers advanced techniques that will help you climb the ranked ladder. These strategies separate casual Gnar players from those who truly master the champion’s potential.
First, learn to manipulate your rage generation strategically. In situations where you need to stall your transformation, avoid attacking enemies and focus on last-hitting minions only. Conversely, when you need to transform quickly, look for opportunities to hit both champions and minions to accelerate rage gain.
Develop your wall awareness to maximize Mega-Gnar’s ultimate potential. Study the map and memorize locations where enemies can be stunned against walls. Common hotspots include:
- The narrow pathways in the jungle
- Around Baron and Dragon pits
- Near towers and inhibitors
- Between the walls in mid lane
Master the art of wave manipulation as Mini-Gnar to create slow pushes that force enemies to respond, creating numerical advantages elsewhere on the map. This is similar to how Ezreal creates map pressure through wave clear and mobility.
Practice using Mega-Gnar’s abilities for objective control. Your Boulder Toss and GNAR! ultimate can zone enemies away from Baron or Dragon, while Wallop provides crucial crowd control during contested objectives.
Learn matchup-specific techniques. For example, against mobile mages like Ahri, save your Hop to counter their engage tools. Track enemy cooldowns mentally so you know when you can be aggressive in Mini-Gnar form without fear of retaliation.
Finally, work on your split-pushing skills for situations where team fighting isn’t optimal. Gnar can be an effective split pusher with his ranged waveclear as Mini-Gnar and tower-taking potential as Mega-Gnar. Always maintain map awareness and have an escape plan ready.
Gear That Helps You Climb
The right mouse, keyboard, and monitor won’t win you games — but they remove excuses. See what the pros actually use.
View Recommended Gear Mice, keyboards, monitors, headsets & more — researched from pro setupsConclusion
Mastering how to play Gnar effectively requires understanding his unique dual-form nature and implementing the strategic tips we’ve covered. From managing your rage bar for optimal transformations to dominating the lane phase, building correctly, executing team fights, and employing advanced techniques, each aspect contributes to your success with this versatile champion.
Remember that Gnar rewards patience and practice. Don’t be discouraged by initial challenges in timing your transformations or landing the perfect ultimate. With experience, you’ll develop the instincts needed to make game-changing plays consistently.
The beauty of learning how to play Gnar lies in his adaptability to various team compositions and matchups. Whether you need to be a lane bully, a split pusher, a team fight initiator, or a peeling protector, Gnar can fulfill multiple roles based on what your team needs.
Take these five essential tips into your next games, practice them consistently, and you’ll see your impact and win rate with Gnar climb steadily. The Missing Link might just be the missing piece in your climb to higher ranks!
Frequently Asked Questions
Is Gnar good for beginners in League of Legends?
Gnar has a moderate learning curve and isn’t typically recommended as a first champion for absolute beginners. His rage management and dual forms require good timing and game awareness. However, for players who already understand League basics and want a versatile top laner with both ranged and melee capabilities, Gnar can be very rewarding to learn. Start in normal games to practice his transformation timing before taking him into ranked matches.
What are Gnar’s biggest weaknesses?
Gnar’s primary weakness is his lack of control over transformations in prolonged fights. Enemy players can exploit the windows when your rage is low after reverting from Mega-Gnar, or force engagements when you’re Mini-Gnar but prefer to be in Mega form. He’s also vulnerable to champions with strong gap closers who can capitalize on Mini-Gnar’s squishiness, and he struggles against opponents who can match both his poke and all-in potential.
How do I manage Gnar’s rage in team fights?
Effective rage management involves entering potential team fight situations with approximately 70-80% rage. This allows you to auto-attack or use abilities to quickly reach transformation when needed. Communicate with your team about your rage status using pings or chat. If you need to stall transformation, avoid attacking and focus on positioning. If you need to transform quickly, look for opportunities to hit multiple targets with your abilities and auto-attacks.
Which champions counter Gnar the hardest?
Gnar struggles most against champions with strong gap closers and burst damage who can punish Mini-Gnar’s squishiness. Champions like Irelia, Jax, u003ca href=u0022https://www.leaguecoachmerch.com/how-to-play-camille/u0022u003eCamilleu003c/au003e, and Riven can jump on Mini-Gnar and deal significant damage before he can transform or escape. Malphite is also challenging due to his attack speed slow affecting Mini-Gnar’s damage output and his ability to match Gnar’s team fight impact. Ranged champions like Teemo and Quinn can also be difficult as they mitigate Gnar’s usual ranged advantage.
What’s the best way to use Gnar’s ultimate effectively?
To maximize Gnar’s ultimate effectiveness, focus on positioning and wall awareness. Before transforming into Mega-Gnar, try to position yourself where you can push multiple enemies into walls or obstacles. Use your E (Crunch) to get behind priority targets before ulting. For advanced plays, practice the E-Flash-R combo where you jump with E, Flash to reposition, then immediately ult. Always scan the environment for walls, and remember that terrain in jungle pathways, near objectives, and around structures offers the best opportunities for multi-target stuns.


