Key Takeaways
- Master Q sweetspots by using E and W to set up precise hits for maximum damage and healing.
- Control the wave with freezes in tough lanes and slow pushes in winning matchups to set up dives.
- Adapt your build with Goredrinker as the core, then flex into Black Cleaver, Death’s Dance, or Maw based on the enemy team.
- Flank in teamfights to reach priority carries instead of engaging front-to-back.
- Respect hard counters like Fiora, Irelia, and Jax by playing safe early and calling for jungle assistance.
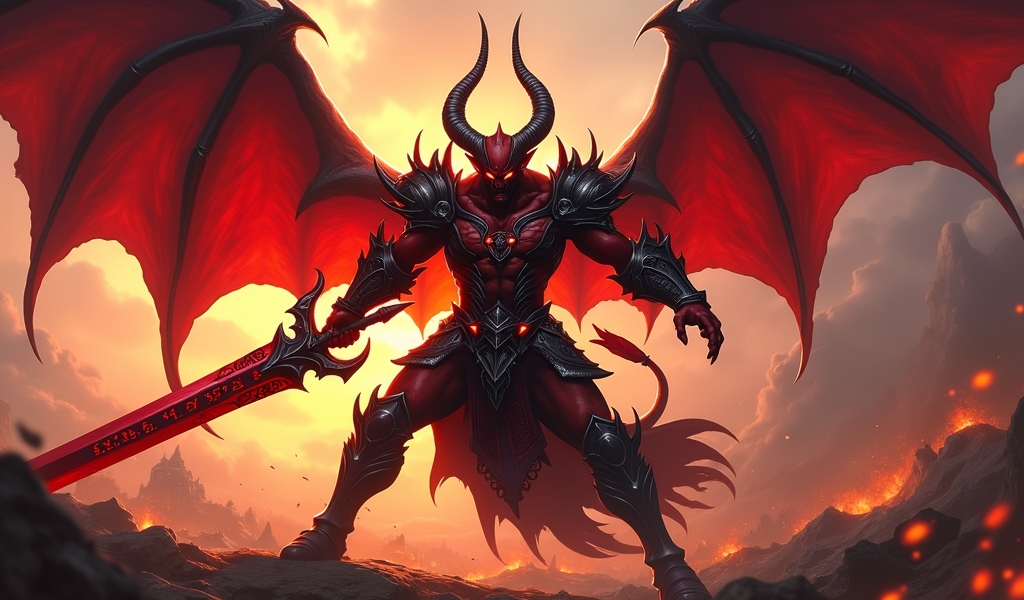
Few champions in League of Legends feel as imposing as Aatrox. Towering over his opponents with a demonic blade and relentless healing, he can dominate lane, dismantle tanks, and carve through entire teams in the right hands. But Aatrox isn’t a champion you can master overnight — he rewards players who put in the time to refine their mechanics, understand matchups, and read the flow of a game. This 2025 guide will take you through every stage of playing Aatrox, from early laning to late-game teamfights, with detailed advice on builds, combos, and counterplay so you can turn the Darkin Blade into a climbing machine.
Table of Contents
Why Aatrox Works in the Current Meta
In Patch 14.15, slight adjustments to sustain items left Aatrox’s core gameplay intact. His ability to thrive in extended fights — thanks to scaling healing from abilities, runes, and items — makes him a nightmare for comps that lack the tools to disengage. He’s especially effective against immobile bruisers and juggernauts, where his sweetspot damage is difficult to dodge and his sustain allows him to win war-of-attrition trades.
Aatrox shines when drafted into champions like Darius or Mordekaiser, where he can punish predictable movement patterns and outlast them in fights. He struggles more against highly mobile duelists such as Fiora, Irelia, and Jax, who can dodge his Q sweetspots and turn trades in their favor. Understanding these dynamics before the game even begins will help you decide whether to pick Aatrox at all.
Understanding the Darkin’s Toolkit
Part of Aatrox’s strength lies in how deceptively simple his abilities look on paper. His passive, Deathbringer Stance, enhances his next basic attack every few seconds, adding bonus damage and healing. Using this off cooldown in trades is a free source of sustain and poke. His signature ability, The Darkin Blade (Q), comes in three casts, each with a slightly different area of effect. Landing the outer edge — the “sweetspot” — deals bonus damage, knocks up enemies, and significantly increases his healing when combined with items like Goredrinker.
Infernal Chains (W) slows enemies and pulls them back if they remain in its zone, acting as a setup tool for sweetspots. Umbral Dash (E) is a short dash that can be cast during other abilities to adjust your positioning and also increases all healing you receive. Finally, World Ender (R) transforms Aatrox into a larger, faster, stronger version of himself, drastically boosting his healing and extending his kill threat. It’s an ability that can completely change the outcome of a fight if used early enough to get full value.
Early Game: Setting Up the Lane
Aatrox’s first three levels are critical for establishing control. At level one, starting Q allows you to threaten the enemy with a sweetspot hit if they move up for farm. Be mindful of its cooldown, as missing it leaves you open to retaliation. Once you hit level two and unlock E, you can start weaving dashes into your Q casts, making them harder to sidestep. By level three, adding W gives you a reliable way to keep opponents in place long enough to land all three Qs in a trade.
Wave control is everything in Aatrox’s early game. Against matchups you outclass, such as Garen, you can slow push the first few waves, build up a minion advantage, and crash them under the enemy tower to look for a dive with your jungler. In more dangerous lanes like Irelia, freezing near your own turret makes it harder for her to all-in and gives your jungler a safe window to gank. Burning all three Qs on minions is risky early on — you want them available for trades or disengaging if the enemy jungler appears.

Mid Game: Owning the Side Lane
Once outer towers fall, Aatrox becomes a potent side lane threat. If you’re ahead, you can pressure towers and force 1v1s against anyone who comes to answer you. Even if two opponents rotate, your goal is to kill one and escape, forcing the enemy to commit multiple resources just to keep you in check. When you’re behind, it’s often smarter to group earlier, as your area damage and crowd control can still swing fights in your team’s favor.
Objective timing is key. Before a Dragon or Baron fight, push out a side lane to force the enemy to respond. This creates a numbers advantage or at least delays their arrival to the fight. Watching LCK match VODs can give you a feel for how top players manage these rotations.
Late Game: Deciding Fights
In the late game, Aatrox transforms from a lane bully into a fight-defining bruiser. The temptation is to charge straight at the enemy frontline, but you’ll often find more success by flanking. Approaching from the side or behind forces carries into awkward positions and makes it harder for them to dodge your sweetspots.
World Ender should be activated at the start of a fight rather than as a last resort — the earlier it’s used, the longer you can benefit from its healing and damage buffs. In even games, grouping with your team is usually optimal; in games where you’re massively ahead, split pushing can draw so much pressure that your team wins fights elsewhere by default.
Perfecting the Q Sweetspot
Every Aatrox main will tell you that hitting sweetspots is the real difference-maker. The first Q is a straight line, the second a wider cone, and the third a narrow, high-impact strike that knocks up enemies in the center. Using E during any Q lets you shift the sweetspot mid-cast, making it unpredictable. W is a natural setup — if the pull connects, you can almost always land your full Q rotation.
In trades, weaving an auto attack between Q casts not only maximizes damage but also triggers your passive more often, adding sustain. Spending time in the practice tool to get a feel for sweetspot ranges will pay off immensely in real games.
Advanced Combos and Tricks
Once you’re comfortable with the basics, you can start incorporating advanced techniques. The Q Flash combo lets you begin a Q cast, then flash mid-animation to instantly reposition the hitbox, catching opponents who thought they were safe. E buffering allows you to input the dash during a Q without interrupting it, shifting the hitbox at the last moment. And don’t forget that W can cancel certain dashes — stopping a Riven Q3 or Camille Hookshot mid-animation can turn a fight in your favor.
Item Builds and Runes
Goredrinker remains Aatrox’s mythic of choice, providing health, AD, ability haste, and an AoE heal that perfectly synergizes with his kit. After that, build according to the game state: Black Cleaver for shredding tanks, Death’s Dance for survivability against heavy AD, or Maw of Malmortius against burst mages. Serylda’s Grudge is a strong late-game option, as the slow makes sweetspots easier to land.
For runes, Conqueror is non-negotiable, stacking quickly with your Q and auto attacks. Triumph adds clutch healing after takedowns, Legend: Tenacity reduces the impact of crowd control, and Last Stand increases damage when you’re low — which synergizes with your healing-heavy playstyle. Resolve as a secondary tree (Second Wind + Revitalize) is great for durability, while Inspiration can add utility through Magical Footwear and Cosmic Insight.

Wave Management and Trading Patterns
Aatrox’s wave control can win or lose games. Freezing near your tower against hard matchups like Fiora denies them easy trades and jungler assistance. Slow pushing into easier opponents sets up big wave crashes and dive opportunities. Fast pushing before roaming forces enemies to miss farm while you impact the map.
In trades, a common pattern is Auto → W → Q1 → E → Q2 → Q3 → Auto. This maximizes crowd control uptime and ensures you get multiple passive procs. Watch for power spikes at level three, level six, and level nine, when your Q is maxed.
Matchup Insights
Aatrox enjoys fighting champions like Mordekaiser, whose telegraphed abilities make them easy sweetspot targets, and Garen, who can’t match his sustain in extended trades. Against Darius, your E lets you sidestep his pull and kite his all-ins.
Hard matchups demand respect. Fiora can nullify your key abilities with Riposte, Irelia can reset onto you if you mismanage the wave, and Jax wins extended trades if you fight into Counter Strike. Patience and jungle coordination are your best tools in these lanes.
Team Synergy and Composition Fit
Aatrox thrives alongside champions who can engage fights and lock enemies in place. Supports like Alistar or Leona create the perfect conditions for landing sweetspots, while mid laners like Orianna or Viktor add AoE damage to your disruption. Junglers with reliable lockdown, such as Jarvan IV or Sejuani, make coordinated engages deadly. Avoid comps with no real engage, as Aatrox struggles to start fights alone.
Mistakes to Avoid
Many new Aatrox players waste their Qs clearing minions at the wrong time, leaving them vulnerable to all-ins. Others hold World Ender until they’re nearly dead, missing out on its extended benefits. Overcommitting to split pushes without vision can also throw games — remember that Aatrox’s teamfight presence is often just as valuable as his 1v1 potential.
Final Thoughts
Aatrox is a champion who demands both mechanical precision and strategic awareness. If you can master his sweetspots, control waves, and pick your fights wisely, you’ll become a consistent threat in any game. Keep an eye on U.GG’s Aatrox stats to stay updated on optimal builds, and put these strategies into practice. With time, you’ll be the one dictating the pace of top lane — and forcing your opponents to fear the Darkin Blade.
Frequently Asked Questions
Is Aatrox good for beginners?
Aatrox has a moderate learning curve. His sustain makes him forgiving for newer players, but mastering sweetspot accuracy and wave management takes practice. Beginners can start with basic trades before learning advanced combos.
What is the best first item on Aatrox?
Goredrinker is the most consistent first item, providing health, damage, ability haste, and an active heal that works perfectly with his kit. In very specific matchups, you might rush Maw of Malmortius or Death’s Dance, but these are exceptions.
How do I play Aatrox in teamfights?
Look for flanks rather than running in front-to-back. Activate World Ender early, hit as many targets as possible with your Q sweetspots, and use E to reposition mid-combo. Target immobile carries first, or peel for your own if the enemy has strong divers.
When should I split push versus group?
Split push when you can win 1v1s or force multiple enemies to respond to you. Group when fights are even and your team benefits from your AoE healing and crowd control.
How do I counter champions like Fiora or Irelia as Aatrox?
Play safe early, avoid extended trades, and call for jungle assistance. Against Fiora, bait her Riposte before committing your Q combo. Against Irelia, freeze near your tower to limit her engage range.


