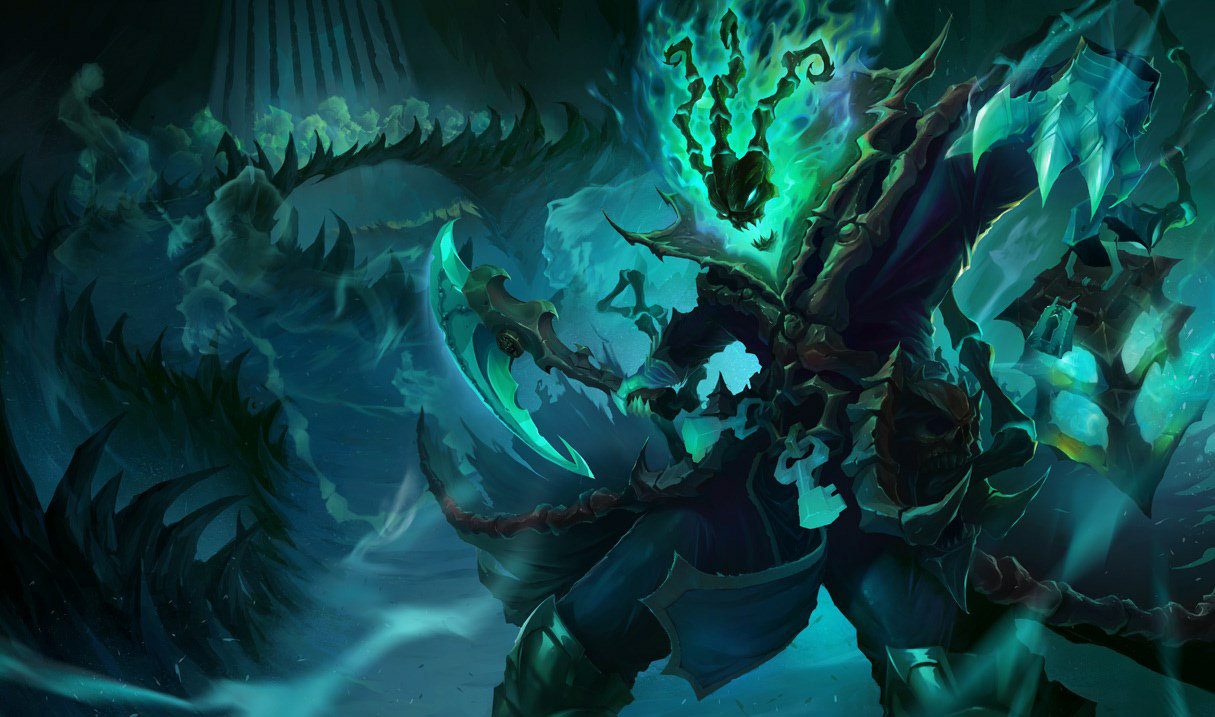
How to Play Thresh: 7 Essential Tips for League Domination
Find Your Counter Pick & Track Your Champion Pool
Use our free tools to counter any champion, take a quiz to find your perfect main, and track your practice sessions.
Overview
How to play Thresh effectively requires mastering his versatile kit of hooks, lanterns, and crowd control abilities while adapting your positioning between aggressive playmaking and defensive peeling based on game circumstances. The Chain Warden rewards skilled players with incredible pick potential, team-saving plays, and flexible build paths that can influence the entire map through proper vision control and strategic engagements.
Table of Contents
Introduction to Thresh
Learning how to play Thresh effectively can transform your support game and carry you to new heights in League of Legends. As one of the most versatile and impactful support champions, Thresh combines crowd control, utility, and playmaking potential that few other champions can match. His unique kit allows skilled players to dominate the bot lane and influence the entire map with game-changing plays.
This comprehensive guide will walk you through seven essential tips for mastering Thresh, from hook mechanics to teamfight positioning. Whether you’re a support main looking to expand your champion pool or a beginner wanting to learn one of League’s most rewarding champions, these strategies will help you climb the ranked ladder and impress your teammates.
Thresh stands apart from many other support champions due to his incredible versatility. Unlike Braum’s defensive playstyle or Blitzcrank’s singular focus on picks, Thresh can adapt to nearly any situation. Let’s dive into what makes the Chain Warden such a formidable force on the Rift and how to play Thresh like a challenger support.
Mastering the Basics: Understanding Thresh’s Kit
Before diving into advanced techniques, it’s crucial to understand the fundamentals of Thresh’s abilities. His kit revolves around five key components that work together to create one of the most cohesive support packages in the game.
Thresh’s passive, Damnation, allows him to collect souls that drop from minions and champions, granting armor and ability power. This unique scaling mechanism makes him naturally tanky as the game progresses, without building traditional tank items.
His Q, Death Sentence, is his signature skill – a hook that stuns the first enemy hit and gives Thresh the option to dash toward them. This ability forms the cornerstone of his playmaking potential and will be your primary engagement tool.
Dark Passage (W) throws a lantern that shields allies and provides them an escape route when clicked. This ability alone sets Thresh apart from other supports, offering unparalleled rescue potential and engage opportunities.
Flay (E) is a versatile crowd control tool that pushes or pulls enemies depending on which direction you cast it. Mastering this ability’s directionality is key to unlocking Thresh’s full potential.
Finally, his ultimate, The Box, creates walls that slow and damage enemies who pass through them. Used correctly, it can zone entire teams, split them apart, or trap priority targets.
Understanding how these abilities synergize is the foundation of learning how to play Thresh effectively. Now, let’s explore the specific techniques that will elevate your Thresh gameplay.

Tip 1: Landing Hooks Like a Pro
The Death Sentence hook is what makes or breaks a good Thresh player. Landing consistent hooks will dramatically increase your impact in lane and throughout the game. The key to improving your hook accuracy lies in prediction rather than reaction.
First, master the concept of “zoning.” Simply by positioning aggressively and threatening your hook, you can deny enemies farm and force them into uncomfortable positions. This psychological pressure is as valuable as landing the hook itself.
Instead of aiming directly at your target, aim where they’re likely to move. Watch for predictable patterns when enemies last hit minions or retreat from trades. These moments of focused attention create windows where players move more predictably.
Here are some advanced hook techniques to practice:
- The “Flash-Hook” – Flash forward and immediately cast your hook for an unexpected angle
- The “Hook-Flash” – Start your hook animation, then flash to change the trajectory
- The “Fake-Out” – Walk forward aggressively as if to hook, then back off, only to hook when they relax
- The “Blind Hook” – Throwing hooks into unwarded bushes or over walls based on game sense
Remember that hook cooldown management is crucial. A missed hook creates a significant vulnerability window, similar to Nautilus’s anchor toss. Early in the game, consider maxing E first if you’re struggling with hook accuracy, as it provides more consistent crowd control on a lower cooldown.
According to ProGuides statistics, the highest-ranked Thresh players land approximately 65% of their hooks in lane. Set this as your goal and track your progress to improve consistently.
Tip 2: Making Game-Changing Lantern Plays
Thresh’s Dark Passage (W) is arguably the most unique support ability in League of Legends. This lantern doesn’t just shield allies – it offers mobility options that can completely change the outcome of skirmishes, ganks, and teamfights.
Communication is essential for maximizing lantern value. Let your teammates know when your lantern is available and ping it when thrown. In solo queue, many players aren’t accustomed to utilizing Thresh’s lantern, so clear communication increases the chances they’ll click it when needed.
Beyond basic rescues, here are some advanced lantern techniques:
- Jungle taxi: Use your lantern to pull your jungler into lane for unexpected ganks
- Hook-lantern combos: Hook an enemy, throw the lantern behind you, and have a teammate join you deep in enemy territory
- Objective steals: Position near Baron or Dragon, then lantern your jungler in for a potential smite steal
- Escape route planning: Place lanterns over walls that would otherwise require Flash to traverse
Remember that enemies can block your lantern by standing on top of it. Counter this by placing the lantern in locations that are difficult for enemies to reach, such as over walls or in bushes. Alternatively, use your Flay or ultimate to clear a path to your lantern.
Even if no allies take your lantern, the shield component still provides value in fights. Don’t hesitate to use it purely as a defensive tool when necessary, similar to how Rakan uses his shields to protect allies.
Tip 3: Perfecting Your Flay Mechanics
Flay (E) is often underestimated but mastering this ability separates good Thresh players from great ones. The versatility of being able to push or pull enemies makes it an incredibly powerful tool in your arsenal.
The most important technique to learn is the Q-E combo. After landing a hook, instead of immediately taking the second cast of Q to dash in, wait until the stun duration is almost over. Then, take the Q and immediately Flay the target back toward your team. This extends the crowd control duration and positions the enemy exactly where you want them.
Flay can also be used defensively to peel for your carries. When diving champions like Irelia or Jax attempt to reach your backline, a well-timed Flay can completely negate their engage tools. This versatility makes Thresh particularly effective against dive compositions.
Here are some situations where Flay shines:
- Interrupting dashes and jumps (Tristana W, Lee Sin Q, etc.)
- Canceling channeled abilities (Katarina R, Miss Fortune R, etc.)
- Creating distance between enemies and your carries
- Pushing enemies into The Box walls for additional damage and slows
- Pulling enemies away from safety or into skill shots
The directionality of Flay can be confusing at first. A simple rule to remember: your mouse position relative to Thresh determines the direction. If your cursor is behind Thresh, you’ll pull enemies toward you. If it’s in front, you’ll push them away. Practice this in the training tool until it becomes second nature.
Many professional Thresh players, including CoreJJ, prioritize maxing Flay second after Q to reduce its cooldown and increase its damage potential in the mid-game.
Tip 4: Vision Control and Map Awareness
Exceptional vision control is a fundamental part of learning how to play Thresh effectively. His pick potential is multiplied when you can spot isolated targets through superior vision. Additionally, denying enemy vision creates opportunities for your hook-lantern combos to catch opponents off guard.
Always carry at least one control ward and coordinate with your jungler to secure deep vision. Thresh excels at safely clearing wards thanks to his ranged auto-attacks and the ability to shield himself with W if threatened while warding.
Strategic ward placements for Thresh include:
- Tri-brush and river entrances during laning phase
- Enemy buff and jungle entrances when ahead
- Baron and Dragon pits before objectives spawn
- Flanking routes during mid and late game
Your Oracle Lens is particularly valuable when setting up ambushes. Clearing enemy vision around objectives or common rotation paths creates prime hook opportunities. This strategy is similar to how Pyke players set up ambushes but with more utility for your team.
Map awareness goes beyond just placing wards. Train yourself to frequently check the minimap for potential roaming opportunities. Thresh’s mobility with Q and ability to bring allies along with W makes him exceptional at influencing other lanes after securing an advantage bot.
According to League of Graphs, the highest win rate Thresh players place an average of 1.8 wards per minute – aim to match or exceed this number to maximize your map control.
Tip 5: Optimal Item Builds and Adaptations
Thresh’s item builds should reflect his hybrid nature as a playmaking support with both defensive and offensive capabilities. Unlike pure tank supports like Alistar or utility enchanters, Thresh benefits from a balanced approach to itemization.
Start with Steel Shoulderguards for the tankiness and gold generation. Your first major purchase should typically be Locket of the Iron Solari, which provides team-wide shielding that complements your protective playstyle. This core item gives you and your team survivability in early skirmishes.
After your mythic, adapt your build based on the game situation:
- Against heavy AD: Dead Man’s Plate for mobility and armor
- Against AP threats: Force of Nature or Abyssal Mask
- When peeling is crucial: Knight’s Vow linked to your ADC
- For aggressive playmaking: Mobility Boots and Turbo Chemtank
- Against healing: Thornmail (you can easily apply 60% Grievous Wounds with your CC)
Don’t underestimate the value of early Boots of Mobility. The extra movement speed allows you to roam, ward deeper, and position for hooks more effectively. If the game extends, consider swapping to Mercury Treads or Plated Steelcaps based on the enemy damage profile.
Your rune selection should complement your playstyle and matchup. Aftershock provides survivability after engaging, while Guardian offers better protection for your ADC in tough lanes. Secondary runes should include Bone Plating for lane survivability and Unflinching for tenacity against CC-heavy teams.
Always save an item slot for control wards throughout the game. Vision control remains a priority even in the late game, and the investment in control wards typically pays off through picks and objective control.
Tip 6: Teamfight Positioning and Engagement
Thresh’s role in teamfights is multifaceted – you can engage, peel, or do both depending on the situation. Understanding your primary responsibility in each fight is crucial for maximizing your impact.
When your team needs engagement, position at the front line looking for hook opportunities on priority targets. However, unlike Leona’s all-in approach, Thresh doesn’t need to commit fully after landing a hook. You can choose not to take the second part of your Q if the situation doesn’t look favorable.
In defensive scenarios, position yourself between your carries and the enemy threats. Your Flay and The Box create zones of control that discourage diving champions from reaching your backline. This flexible positioning allows you to adapt as the teamfight evolves.
The Box should be used strategically in teamfights:
- To zone enemies away from objectives
- To split enemy teams, isolating targets
- As follow-up CC after landing a hook
- Defensively to create a safety zone around your carries
- To block narrow jungle pathways during retreats
Remember that your lantern provides a team-wide shield in addition to its mobility function. In chaotic teamfights, even if nobody clicks it, throwing your lantern into the middle of your team can provide valuable survivability.
Track key enemy cooldowns, particularly Flash. Champions without Flash are much easier hook targets, similar to how Bard players look for immobile targets for their Q stuns. Communicate these windows of opportunity to your team to coordinate focuses.
Your positioning should evolve throughout the teamfight. You might start at the front looking for an engage, then fall back to peel once the fight begins, and finally move forward again to chase down survivors with hooks. This dynamic positioning maximizes Thresh’s versatile kit.
Tip 7: ADC Synergies and Lane Matchups
Understanding which ADCs synergize well with Thresh and how to approach different lane matchups is essential for consistent success. Thresh works particularly well with ADCs who can follow up on his crowd control or provide additional CC of their own.
Top-tier ADC pairings for Thresh include:
- Jinx: Chain CC with Chompers after your hook
- Jhin: Follow-up root after your hook for extended CC
- Aphelios: Incredible damage follow-up and gravitum CC chain
- Lucian: Early aggression and dash synergy with your lantern
- Kalista: Her ultimate pairs perfectly with your engage potential
Adjust your playstyle based on matchups. Against poke supports like Zyra or Brand, focus on all-in potential rather than trading. Against enchanters like Soraka or Sona, look for hook opportunities to prevent them from scaling. Against fellow engage supports, the lane often comes down to who engages first – patience is key.
When facing hook champions like Blitzcrank, position behind minions and use Flay to interrupt their engage attempts. Against enchanters, prioritize early aggression to prevent them from scaling into their stronger mid and late game.
Communication with your ADC is crucial. Establish a clear understanding of when you’re looking to engage versus when you want to play defensively. Thresh excels when both bot laners are on the same page regarding aggression levels and target priority.
Remember that collecting souls is important but not at the expense of proper positioning. Don’t risk your safety for souls in dangerous areas, especially when behind. However, when ahead, use your dominant position to collect souls aggressively and build your scaling advantage.
Gear That Helps You Climb
The right mouse, keyboard, and monitor won’t win you games — but they remove excuses. See what the pros actually use.
View Recommended Gear Mice, keyboards, monitors, headsets & more — researched from pro setupsConclusion
Mastering how to play Thresh is a rewarding journey that can dramatically improve your support gameplay. His versatile kit allows for both aggressive playmaking and defensive peeling, making him valuable in virtually any team composition and against any opponent.
The seven tips we’ve covered – from hook mechanics to ADC synergies – provide a comprehensive framework for developing your Thresh skills. Remember that consistency is key; even professional players didn’t perfect their Thresh gameplay overnight.
Start by focusing on the fundamentals: landing hooks, using lantern effectively, and managing your Flay directions. As these become second nature, incorporate the more advanced techniques like vision control strategies and adaptive build paths.
Perhaps the most important aspect of playing Thresh effectively is decision-making. Knowing when to engage, when to peel, and when to roam comes with experience and game awareness. Each game with Thresh will teach you something new about the champion’s capabilities.
With practice and dedication to these principles of how to play Thresh, you’ll soon be making soul-collecting plays that turn games and impress your teammates. The Chain Warden offers one of the highest skill ceilings in the support role, meaning there’s always room to grow and improve.
Frequently Asked Questions
Is Thresh good for beginners in League of Legends?
Thresh has a moderate learning curve but offers tremendous growth potential for new players willing to practice. Start with focusing on basic hook accuracy and positioning before moving to advanced techniques.
What are Thresh’s best summoner spells?
The most common setup is Flash + Ignite for aggressive play, or Flash + Exhaust if you need to peel for a vulnerable ADC or counter heavy engage compositions.
Should I always max Thresh’s Q first?
Yes, in most games, maxing Q (Death Sentence) first provides better crowd control and lower cooldowns on your primary playmaking tool. However, E (Flay) can be maxed first in tough matchups or when hooks are hard to land.
What are Thresh’s worst lane matchups?
Thresh struggles against poke-heavy enchanters like Zyra, Karma, or Brand, who can harass from a safe distance. Against these matchups, play patiently and look for all-in windows with jungle assistance.
How do I use Thresh’s lantern more effectively in solo queue?
Ping your lantern as you throw it and clearly communicate intentions. Use it proactively for engages or rescues, and place it where allies can easily see and click it—over walls, into fog, or near teammates in danger.

